PyQt QGridLayout is another type of layout. Normally you'd position widgets (buttons, labels et al) with .move(x,y). Not so with a grid.
It positions widgets in an AxB form. Where A is the number of columns and B the number of rows. Similar to what you'd see in excel.
The QGridLayout is part of PyQt5.QtWidgets.
Practice now: Test your Python skills with interactive challenges
Example
QGridLayout
You can create a QGridLayout or grid with a single line of code:
grid = QGridLayout()
Tell the window to use the grid:
win.setLayout(grid)
Widgets can be added to the grid with:
grid.addWidget(widget,col,row)
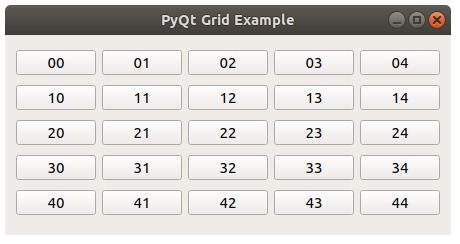
Grid Example
The code below creates a layout containing a group of buttons. It adds a group of buttons by using a nested for loop.
The key part that creates the grid is:
grid = QGridLayout()

for i in range(0,5):
   for j in range(0,5):
       grid.addWidget(QPushButton(str(i)+str(j)),i,j)

win.setLayout(grid)
The rest of the code simply creates the window. But it's easy for copy and paste.
import sys
from PyQt5.QtWidgets import QApplication, QWidget, QLabel, QGridLayout, QPushButton
from PyQt5.QtGui import QIcon
from PyQt5.QtCore import pyqtSlot

def window():
   app = QApplication(sys.argv)
   win = QWidget()
   grid = QGridLayout()

   for i in range(0,5):
      for j in range(0,5):
         grid.addWidget(QPushButton(str(i)+str(j)),i,j)

   win.setLayout(grid)
   win.setWindowTitle("PyQt Grid Example")
   win.setGeometry(50,50,200,200)
   win.show()
   sys.exit(app.exec_())

if __name__ == '__main__':
   window()
Practice now: Test your Python skills with interactive challenges
Practice now: Test your Python skills with interactive challenges